
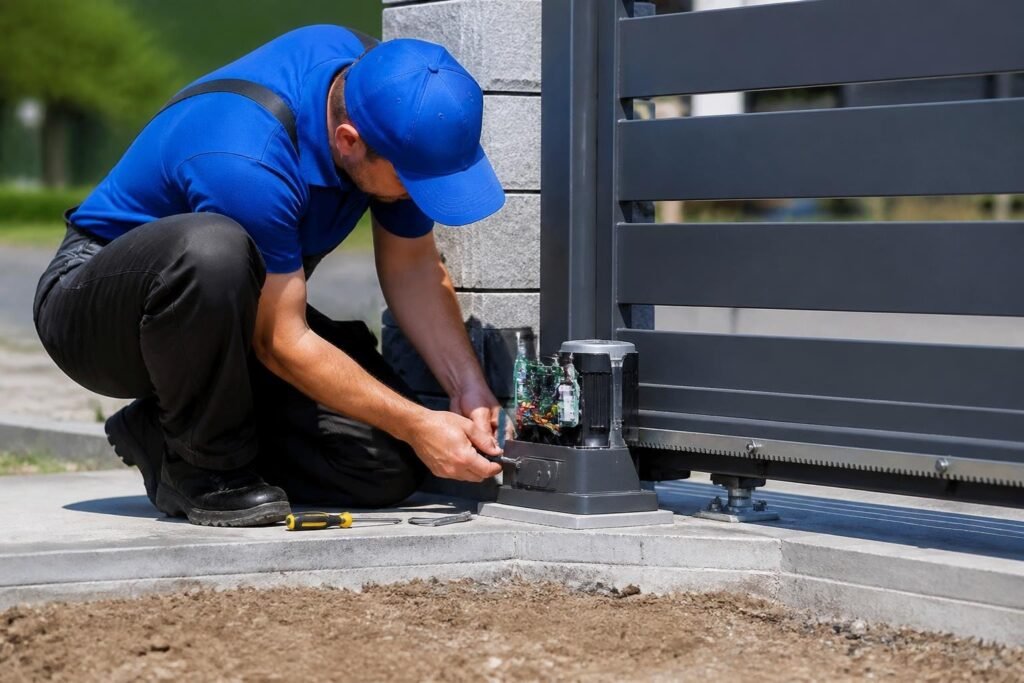
Installing a gate motor transforms your property's security and convenience, but the process demands careful planning, technical expertise, and strict adherence to safety standards. Whether you're upgrading an existing manual gate or installing a completely new automated system, understanding the installation process helps ensure reliable operation for years to come. Gate motor installation involves multiple disciplines-from concrete work and mechanical assembly to electrical connections and safety device integration-making it one of the most complex automated systems on residential and commercial properties.
Understanding Gate Motor Installation Requirements
Professional gate motor installation begins long before the first bolt is tightened. Property owners must consider multiple factors that directly impact system performance and longevity. The gate's weight, width, and frequency of use determine which motor type and capacity you'll need.
Critical pre-installation considerations include:
- Gate weight and dimensions (swing gates vs. sliding gates)
- Daily cycle count (residential vs. high-traffic commercial)
- Power source location and availability
- Underground utility locations
- Local permit requirements and inspections
- Property grade and drainage patterns
Foundation requirements vary significantly between sliding and swing gate motors. Sliding gate motors typically require a concrete pad measuring at least 18 inches wide by 24 inches long and 12 inches deep, though heavier gates may need larger foundations. Swing gate motors often mount directly to existing gate posts or columns, but these structures must be reinforced to handle the motor's torque and the gate's dynamic loads.
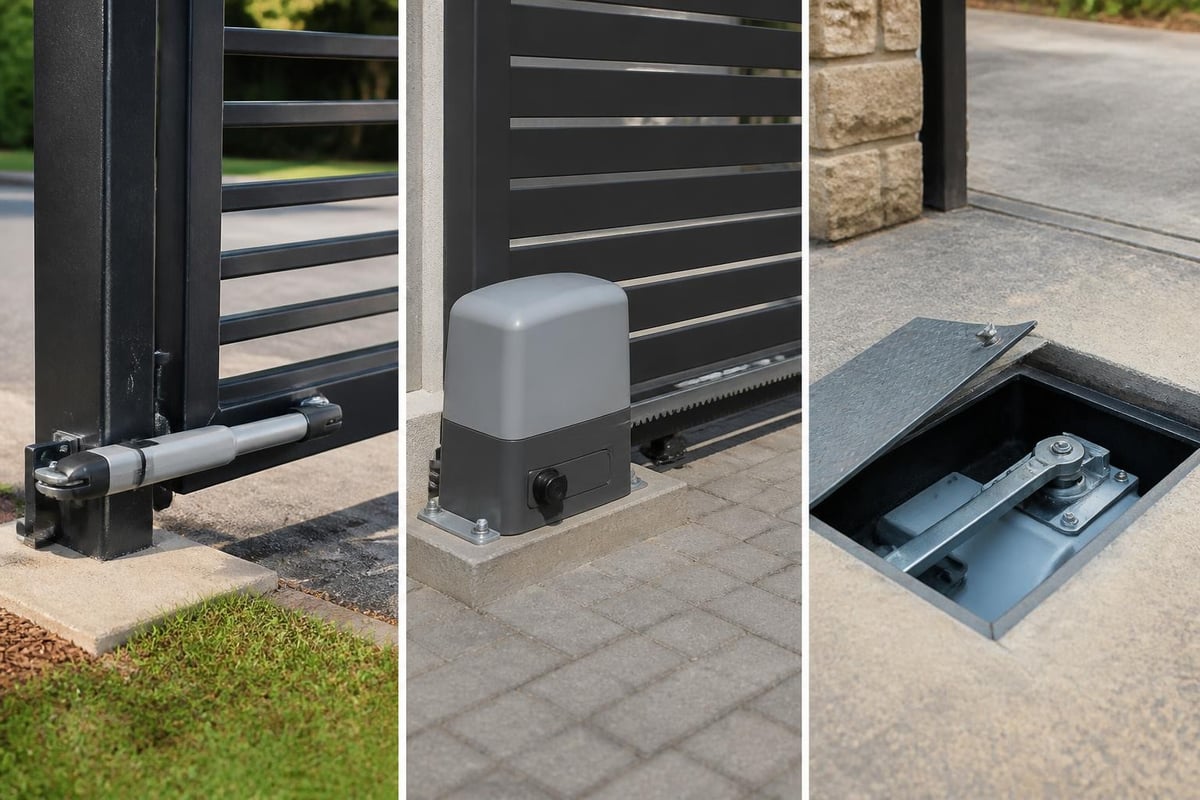
The California Department of General Services technical specifications outline detailed foundation and anchoring requirements that ensure motors remain stable under continuous operation. These standards apply to both public and private installations throughout the state.
Site Preparation and Foundation Work
Proper site preparation makes the difference between a gate motor that operates flawlessly for a decade and one that fails within months. The installation site must provide stable ground conditions, proper drainage, and clear operational space for the gate's full travel path.
Excavation and Concrete Foundation
Gate motor installation demands precise excavation work. For sliding gates, operators must dig the foundation pit to exact dimensions, ensuring level surfaces and proper depth. The concrete foundation must cure for at least 72 hours before motor installation begins, though seven days provides optimal strength.
Foundation work steps follow this sequence:
- Mark and verify all underground utilities before excavation
- Excavate to specified dimensions with level base
- Install conduit sleeves for electrical wiring before concrete pour
- Pour concrete with proper reinforcement (rebar or wire mesh)
- Set anchor bolts or embed plates while concrete is workable
- Allow full curing time before proceeding with installation
| Foundation Element | Sliding Gate | Swing Gate (Post Mount) | Underground Operator |
|---|---|---|---|
| Concrete Depth | 12-18 inches | Varies by post | 24-36 inches |
| Rebar Required | Yes | Sometimes | Yes |
| Conduit Sleeves | 2-inch minimum | 1.5-inch minimum | 2-inch minimum |
| Curing Time | 72 hours minimum | 72 hours minimum | 7 days recommended |
The Northwest Fire District technical bulletin specifies additional requirements for properties requiring emergency access, including conduit separation from other utilities and dedicated circuit specifications.
Electrical Conduit and Wiring Pathways
Underground electrical conduit must be installed before concrete work is completed. Gate motor installation requires running power from the service panel to the motor location, often spanning 50 to 200 feet or more. Conduit must be buried at code-required depths-typically 18 inches for rigid metal conduit and 24 inches for PVC in residential applications.
Planning electrical pathways involves routing that minimizes conflicts with irrigation systems, drainage, and future landscape work. Many installers run additional empty conduit during gate motor installation to accommodate future accessories like intercoms, card readers, or additional safety devices.
Motor Assembly and Mechanical Installation
Once foundations cure and electrical rough-in is complete, gate motor installation moves to mechanical assembly. This phase requires precision alignment and proper hardware torque to ensure smooth, quiet operation.
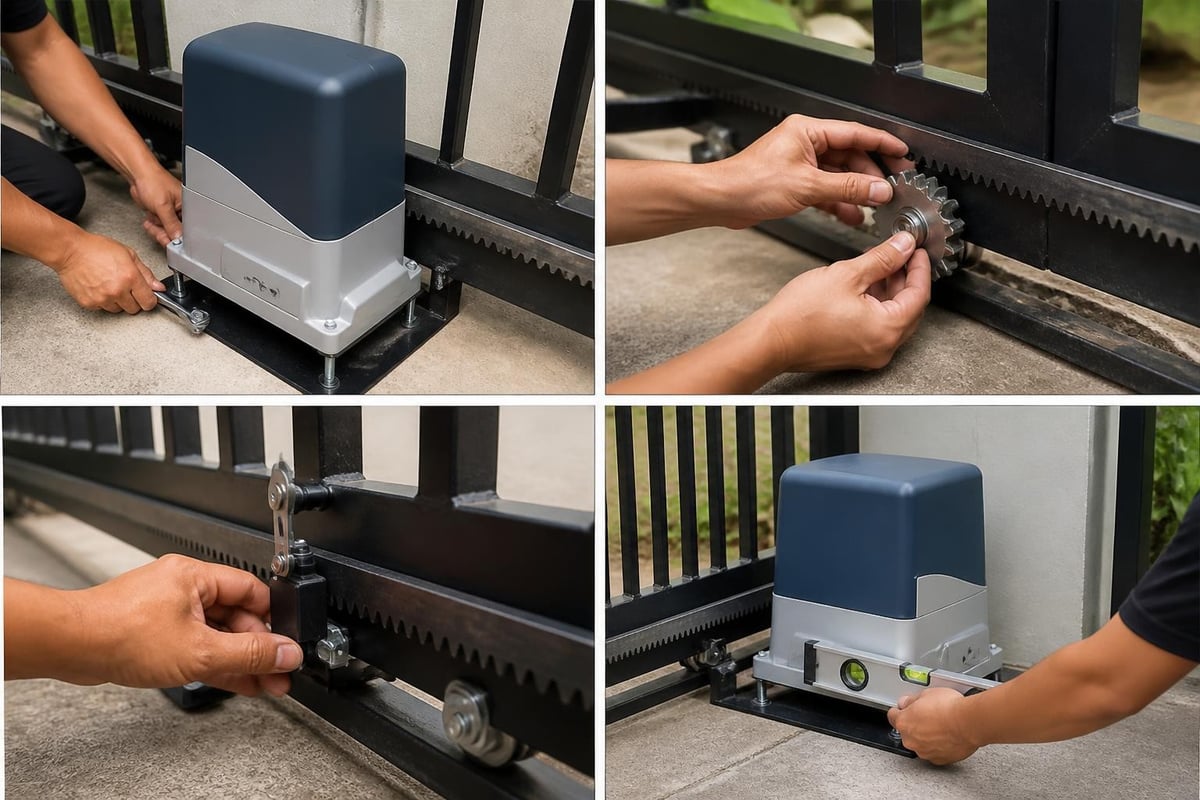
Modern gate motors arrive partially assembled, but installers must complete mounting, drive train installation, and gate attachment. For sliding gates, the track must be perfectly level and aligned with the motor's drive pinion. Even small variations cause premature wear and operational noise.
Key mechanical installation steps:
- Mount motor to foundation using manufacturer-specified bolts
- Install and align gate track with laser level or transit
- Attach drive mechanism (chain, belt, or gear rack)
- Install limit switches and position stops
- Connect manual release mechanism
- Adjust tension and alignment before electrical connection
Swing gate motors require careful attention to hinge geometry. The motor's mounting position relative to the hinge point determines the gate's speed, force curve, and overall efficiency. Installers use the manufacturer's mounting template to position motors at the exact distance and height specified for that gate's dimensions. For properties with unique requirements, professionals can help with choosing the right gate opener based on specific site conditions.
Drive Train Configuration
The drive train transfers motor power to gate movement. Sliding gates typically use a gear rack attached to the gate's bottom rail, which engages with the motor's drive pinion. This rack must be mounted perfectly straight and at the correct height to maintain consistent engagement across the gate's full travel.
Chain-driven systems offer flexibility for longer gate runs but require regular tension adjustment. Belt-driven systems provide quieter operation but may stretch over time in extreme temperature environments common in Los Angeles.
Electrical Connections and Control Integration
Electrical work represents the most regulated aspect of gate motor installation. All wiring must comply with the National Electrical Code (NEC) and local amendments. Gate motors typically require dedicated 120-volt or 240-volt circuits, depending on motor size and manufacturer specifications.
Professional gate motor installation includes these electrical components:
- Dedicated circuit breaker in main service panel
- Properly sized wire gauge for run distance (typically 12 AWG or 10 AWG)
- GFCI protection for outdoor installations
- Transformer for low-voltage control circuits (24V)
- Control board connections and programming
- Safety device integration (photo eyes, edge sensors)
The control board serves as the gate motor's brain, managing limit switches, safety devices, access controls, and programmable features. Installers must configure opening and closing speeds, force limits, auto-close timers, and safety sensor sensitivity during gate motor installation.
| Electrical Component | Typical Rating | Code Reference | Common Issues |
|---|---|---|---|
| Main Circuit | 15-20 amp dedicated | NEC Article 430 | Undersized breakers |
| Wire Gauge | 12 AWG (20A) / 10 AWG (30A) | NEC 310.15 | Voltage drop on long runs |
| Conduit Type | Schedule 40 PVC or RMC | NEC 300.5 | Incorrect burial depth |
| GFCI Protection | Required for outdoor | NEC 210.8 | Nuisance tripping |
The Electronic Code of Federal Regulations section 1211.16 mandates that installation manuals include specific safety information and proper connection diagrams. Professional installers follow these documentation requirements precisely to ensure code compliance.
Safety Device Installation and Testing
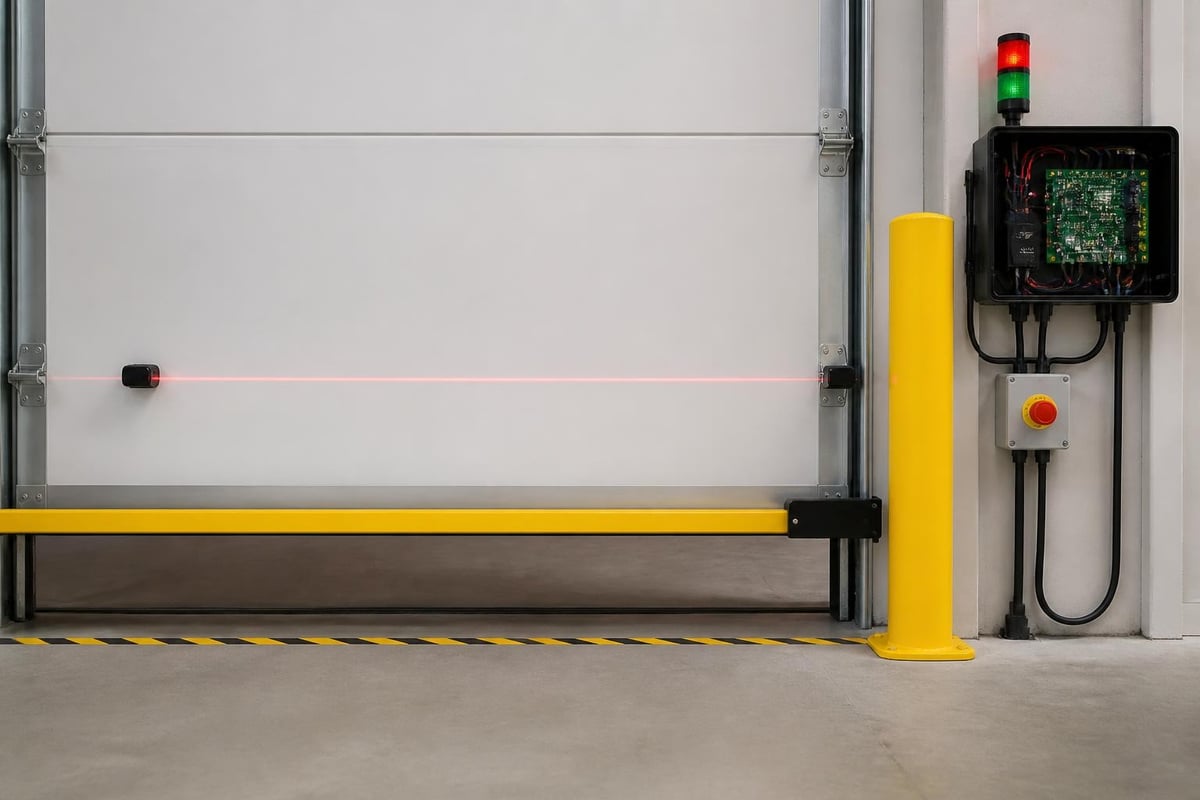
Safety devices prevent gate motors from causing injury or property damage. Modern gate motor installation must include multiple layers of protection to meet current safety standards. These devices work together to detect obstacles, reverse gate movement, and prevent entrapment.
Required safety devices include:
- Photoelectric sensors (photo eyes) across the gate's path
- Pressure-sensitive edge switches on leading gate edges
- Force limit adjustments in control board programming
- Emergency stop buttons at accessible locations
- Audible warning devices for closing cycles
- Visual warning lights (required for commercial installations)
The UK Health and Safety Executive guidance provides comprehensive safety considerations that, while focused on UK installations, offer valuable insights applicable to installations worldwide. These guidelines emphasize risk assessment and appropriate safety device selection based on gate location and use patterns.
Testing safety devices during gate motor installation requires systematic verification. Installers place obstacles in the gate's path to confirm photo eyes detect obstructions and reverse gate movement within safe distances. Edge sensors must trigger reversal when encountering resistance equivalent to 15 pounds of force or less, as specified by European safety standards BS EN 12453.
Force Limit Calibration
Controlling the force a gate motor can exert is critical for preventing injuries. During gate motor installation, technicians calibrate force limits to the minimum required for reliable operation. Gates that encounter obstructions should reverse before exerting dangerous force levels.
Modern control boards allow precise force adjustment for both opening and closing cycles. Closing force typically requires lower limits since gravity assists movement on downhill installations. Installers test force limits using calibrated scales or force gauges, making incremental adjustments until the gate operates reliably while remaining within safe force thresholds.
Access Control Integration
Gate motor installation increasingly includes sophisticated access control systems. Property owners can choose from basic remote controls to advanced smartphone apps, keypads, card readers, and intercom systems. Each access method requires specific wiring and control board configuration during installation.
Remote control systems operate on dedicated frequencies, with most modern systems using rolling code technology to prevent signal copying. The control board's receiver module must be programmed to recognize authorized transmitters during gate motor installation.
Keypad entry systems require low-voltage wiring from the keypad location to the control board. Installation includes mounting the keypad at a comfortable height (typically 48 inches) and within easy reach from vehicle windows. Wireless keypads simplify installation but require battery replacement and may experience interference in some locations.
For commercial properties or high-security residential installations, gate motor installation often includes telephone entry systems or license plate recognition cameras. These advanced systems integrate with the gate motor through relay outputs that trigger gate opening when authorized users are verified. Many Los Angeles property owners are exploring whether they should add solar power to their electric gates to ensure continuous operation during power outages.
Programming and System Configuration
After mechanical and electrical installation is complete, gate motor installation enters the programming phase. Control boards require configuration of multiple parameters that determine how the gate operates under various conditions.
Essential programming settings include:
- Limit positions (fully open and fully closed stops)
- Opening and closing speed profiles
- Auto-close timer duration (if desired)
- Safety sensor sensitivity levels
- Force limit thresholds
- Partial opening positions for pedestrian access
- Vacation or security mode settings
Installers use manufacturer-specific programming procedures, typically involving button sequences or DIP switch configurations on the control board. Some advanced systems allow programming through smartphone apps, making future adjustments more accessible for property owners.
Performance Testing and Adjustment
Comprehensive testing validates all aspects of gate motor installation. Installers cycle the gate through complete open-close sequences multiple times, observing operation smoothness, listening for unusual sounds, and verifying safety device function with each cycle.
Performance testing checklist includes:
| Test Item | Acceptance Criteria | Adjustment If Failed |
|---|---|---|
| Opening speed | Smooth acceleration, no jerking | Adjust speed ramp settings |
| Closing speed | Controlled deceleration at limits | Modify deceleration parameters |
| Photo eye function | Immediate reversal when beam broken | Realign sensors or clean lenses |
| Edge sensor | Reversal within 0.5 seconds of contact | Adjust sensitivity or replace sensor |
| Force limits | Reversal at <15 lbs resistance | Reduce force settings |
| Manual release | Easy operation by one person | Lubricate mechanism or adjust cable |
The City of Tacoma installation specifications outline detailed acceptance testing procedures that professional installers follow to ensure systems meet commercial-grade performance standards.
Weather Protection and Environmental Considerations
Los Angeles weather patterns, while mild compared to many regions, still present challenges for gate motor installation. Extended dry periods followed by heavy winter rains require protective measures to ensure reliable operation year-round.
Control boards and electrical connections require weatherproof enclosures rated for outdoor use. NEMA 4X enclosures provide the best protection against moisture, dust, and UV exposure. These enclosures should be mounted with the cover opening facing downward when possible to prevent water pooling on sealing surfaces.
Drainage around the motor foundation prevents water accumulation that can cause rust and electrical issues. Professional gate motor installation includes grading work that directs water away from mechanical and electrical components. In areas with heavy irrigation, installers may add French drains or gravel-filled trenches to manage groundwater.
Battery backup systems protect against power outages, ensuring gates remain operational during emergencies. These systems require specific installation considerations, including ventilated battery compartments and charging circuit integration. If you're experiencing issues with an existing system, understanding common electric gate problems can help diagnose installation-related issues.
Maintenance Access and Documentation
Professional gate motor installation includes establishing maintenance access and providing comprehensive documentation. Future service work requires easy access to all components without excavation or extensive disassembly.
Access considerations built into proper installation:
- Junction boxes positioned above grade with weatherproof covers
- Control board enclosures mounted at comfortable working height
- Manual release mechanisms clearly labeled and accessible
- Battery compartments with tool-free access
- Service clearances around motor and drive components
Documentation provided at installation completion should include circuit diagrams, control board programming settings, safety device test records, and maintenance schedules. Many jurisdictions require as-built drawings showing underground conduit routes and depths, preventing future damage during landscape or utility work.
The U.S. Access Board technical guidance provides specifications relevant to commercial installations where accessibility compliance is required, including activation device heights, operating forces, and maneuvering clearances that must be documented.
Common Installation Challenges and Solutions
Even experienced professionals encounter challenges during gate motor installation. Recognizing common issues and their solutions prevents delays and ensures quality outcomes.
Frequent installation obstacles:
- Inadequate power supply: Existing electrical service lacks capacity for motor load; requires service panel upgrade or dedicated sub-panel installation
- Underground utility conflicts: Water lines, gas pipes, or cables occupy planned conduit routes; solution involves rerouting or directional boring techniques
- Uneven terrain: Sloped driveways create alignment challenges; requires custom track installation or motor positioning adjustments
- Weak gate structures: Existing gates lack rigidity for motorization; must reinforce with diagonal bracing or structural upgrades
- Property line restrictions: Limited space for swing arc or track extension; may require alternative gate motor types or custom fabrication
For property owners researching their options, connecting with local professionals who offer automatic gate installation services ensures these challenges are identified early and addressed properly. When working with older gates, understanding gate motor repairs helps distinguish between installation issues and component failures.
Soil Condition Adaptations
Southern California soil varies from stable decomposed granite to expansive clay that shifts with moisture changes. Gate motor installation in expansive soils requires deeper foundations extending below the active zone-often 24 to 36 inches-and may include pier-and-grade beam designs that resist differential settlement.
Sandy or loose soils may need foundation enlargement or compacted base layers to prevent settling. Professional installers assess soil conditions during site evaluation, planning appropriate foundation designs before excavation begins.
Final Inspection and Handoff
Professional gate motor installation concludes with final inspection and owner training. Many jurisdictions require electrical inspections before systems can be placed in service, verifying code compliance for all circuits, grounding, and safety devices.
Owner training covers essential operation and maintenance topics:
- Daily operation using all installed access methods
- Manual release operation during power outages
- Basic troubleshooting for common issues
- Safety feature demonstrations and importance
- Maintenance schedule and lubrication requirements
- Emergency contact information for service calls
Warranty documentation, installation certificates, and compliance records transfer to the property owner. Some gate motor manufacturers require professional installation by certified technicians to maintain warranty coverage, emphasizing the value of expert installation over do-it-yourself approaches.
Professional gate motor installation ensures your automated gate operates safely, reliably, and efficiently for years to come. From proper foundation work and electrical connections to safety device integration and system programming, every step requires technical expertise and attention to detail. Whether you're installing a new system or experiencing issues with an existing gate, Gates On Site provides expert installation and repair services throughout Los Angeles, offering same-day service with no extra emergency charges to keep your property secure and accessible.